
Homemade Lactose-Free Butter: The Express Recipe in Just 15 Minutes
Homemade Lactose-Free Butter: The Express Recipe in Just 15 Minutes
Why Make Your Own Lactose-Free Butter?
You can find lactose-free butter in supermarkets nowadays, that's true. But have you ever looked at the ingredient list? Additives, preservatives, sometimes disappointing textures… Nothing beats homemade butter, where you control every single component. Plus, the process is surprisingly simple and fast: count on barely 15 minutes from start to finish.
Making your own butter is also an almost magical experience. Watching liquid cream transform before your eyes into whipped cream, then into golden butter grains, is deeply satisfying. And the taste? Incomparable with store-bought versions.
The Ingredients: Absolute Simplicity
You'll only need two things: 35% fat lactose-free cream and fine salt. That's it. No bacterial cultures, no emulsifiers, no artificial flavours. The 35% fat content is essential because it's what allows the cream to transform into butter. A lighter cream wouldn't give you a satisfactory result.
In terms of yield, expect roughly half the weight in butter compared to the cream you started with. With 250 ml of cream, you'll get approximately 125 g of butter, which is already more than enough to enjoy on your toast for several days.
For the salt, you'll adjust the amount to your preference: between 0.5% and 3% of the weight of the butter you've obtained. This gives you a custom semi-salted butter, exactly to your taste.
The Step-by-Step Method
Pour the lactose-free cream into the bowl of your stand mixer fitted with the whisk attachment. Start it at medium speed. At first, the cream will whip up into soft peaks, nothing surprising so far. But keep whisking without stopping.
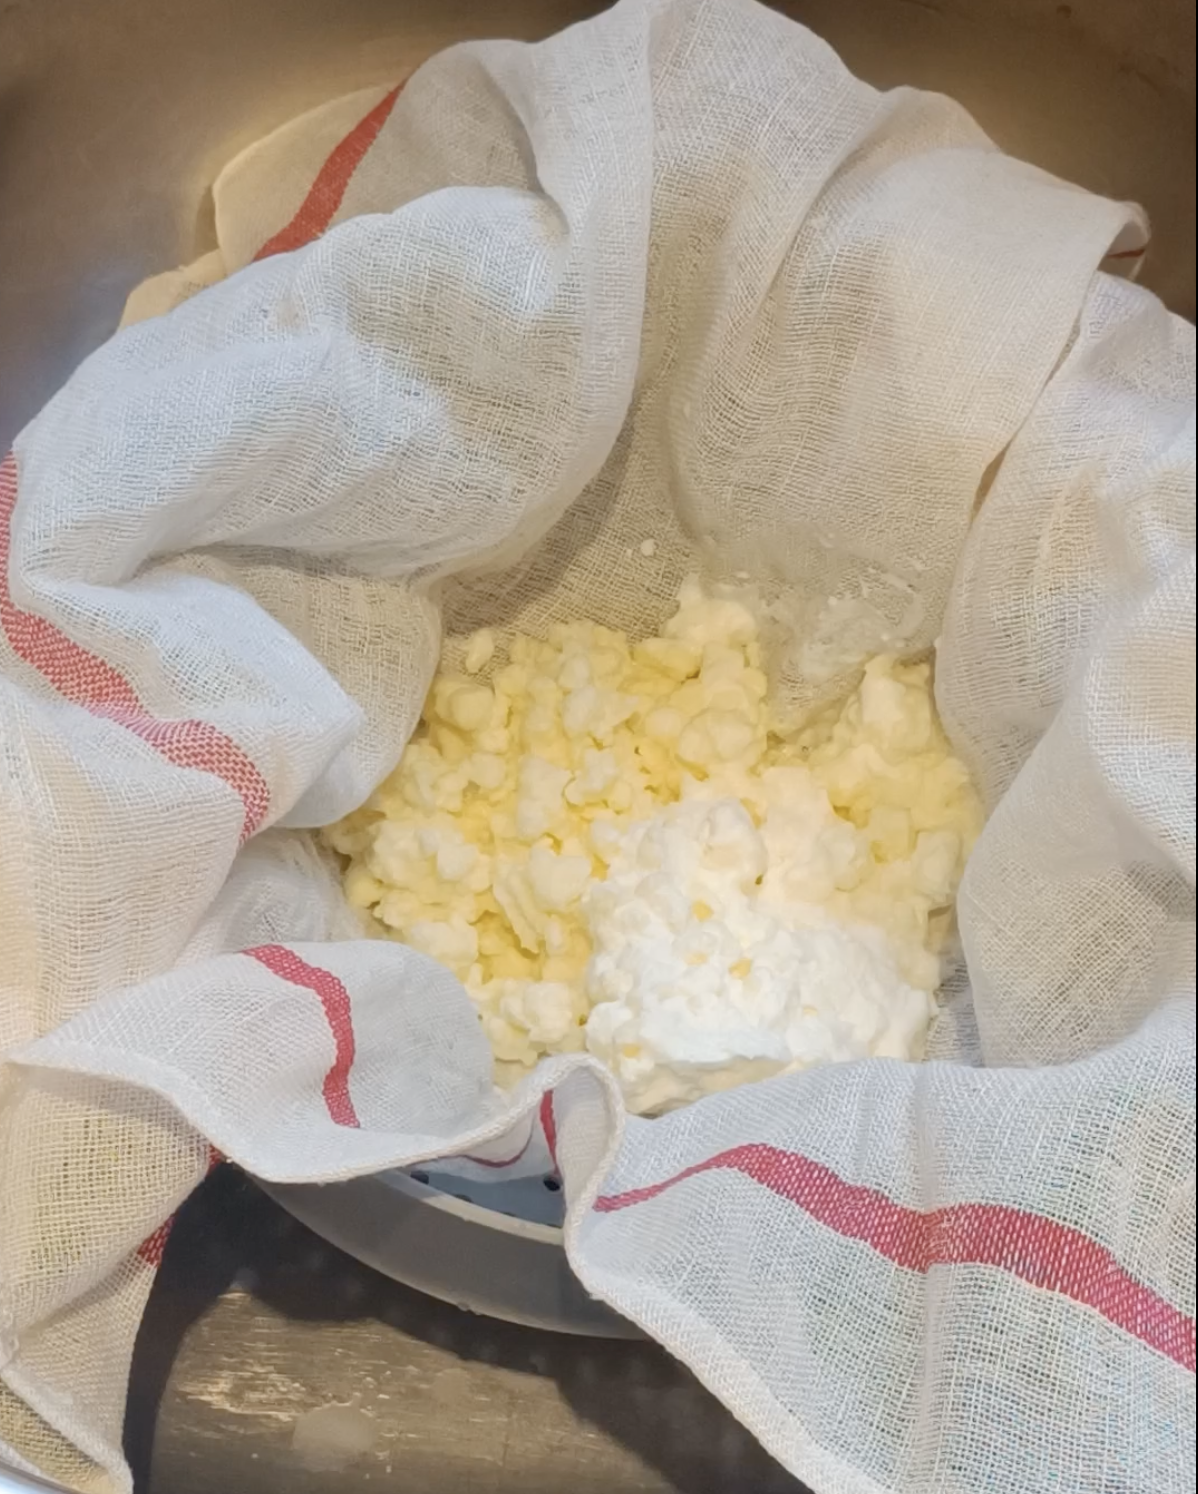
After a few minutes, the magic happens: the whipped cream "breaks" and the fats begin to separate from the liquid. You'll see small yellow grains floating in a whitish liquid. That liquid is buttermilk. And those grains are your future butter.
A word of caution from experience: when the grains start forming, the buttermilk tends to splash everywhere. Remember to cover your mixer with a clean tea towel or use the splash guard if you have one. Your kitchen will thank you.
Don't Throw Away the Buttermilk!
Once the butter grains have formed, carefully drain the buttermilk and save it. This by-product is a real treasure in the kitchen: it adds fluffiness to pancakes, lightness to scones, and incomparable tenderness to cakes. It keeps for a few days in the fridge and can even be frozen.
This is one of the great advantages of homemade butter: zero waste, two products for the price of one.
Rinsing: A Step You Shouldn't Skip
Gather your butter grains and rinse them generously with very cold water. This step is crucial: it removes the last traces of buttermilk, which could cause your butter to go rancid prematurely. Knead the grains under cold water until the water runs perfectly clear.
Cold water is important because it prevents the butter from melting between your fingers as you work it. If your kitchen is warm, don't hesitate to add a few ice cubes to your rinsing water.
Seasoning and Shaping
Once your butter is well rinsed and drained, work in the salt. For a classic semi-salted butter, aim for about 1.5% salt relative to the weight of your butter. Prefer a more pronounced taste? Go up to 3%. Want it milder? Drop down to 0.5%. It's entirely up to you.
Then shape your butter however you like: roll it in cling film for a neat log, press it into a small mould, or simply place it in a ramekin. Refrigerate for at least an hour before serving.
Final Thoughts
Making your own lactose-free butter at home is a small gesture that changes everything. In 15 minutes and with two ingredients, you get a fresh, flavourful product with no additives, perfectly suited to your intolerance. Once you've tasted it, it'll be hard to go back to store-bought butter. So grab your mixers, and enjoy!